


We are pleased to present AITracer by LAD, a plugin for QGIS 4 that brings artificial intelligence directly into the raster digitization workflow in archaeology. Developed by the Digital Archaeology Laboratory (LAD) at Sapienza, AITracer lets you vectorize any feature visible on a georeferenced raster layer — aerial photographs, drone orthophotos, scanned plans, photogrammetric surveys — with a simple mouse click.
The plugin is released under the GNU GPL 3 license and is available on GitHub:
🔗 https://github.com/lad-sapienza/ai-tracer
The problem: manual digitization is slow
Anyone who works daily with raster data in archaeology knows how much time manual vectorization takes: tracing by hand the outlines of wall structures, postholes, stratigraphic cuts or areas of ceramic fragments on a high-resolution orthophoto is a precise but extremely laborious operation. The results depend heavily on the operator’s experience and concentration, and the time required multiplies quickly when there are dozens or hundreds of geometries to digitize.
AITracer does not remove the archaeologist’s judgment — who always remains the interpreter — but radically speeds up the mechanical tracing phase, leaving the operator in full control of the result.
How it works: SAM2 in the service of archaeology
AITracer is based on SAM2 (Segment Anything Model 2), the image segmentation model developed by Meta FAIR and released as open source. SAM2 can identify and outline objects within an image starting from simple point-based cues — so-called prompts — without having been specifically trained on archaeological images.
The workflow is as follows:
- Load a georeferenced raster layer in QGIS and zoom to the area of interest.
- Activate the plugin via the AITracer by LAD panel and click on the object to digitize.
- SAM2 analyzes the visible portion of the canvas and returns the outline of the feature within moments, displayed as a green preview polygon directly on the map.
- Accept the polygon (Enter key) or refine the result with additional clicks before accepting it.
The model runs locally, on your own computer, without sending any data to external services.
The control panel
Once installed, the plugin adds a side panel to the QGIS window.
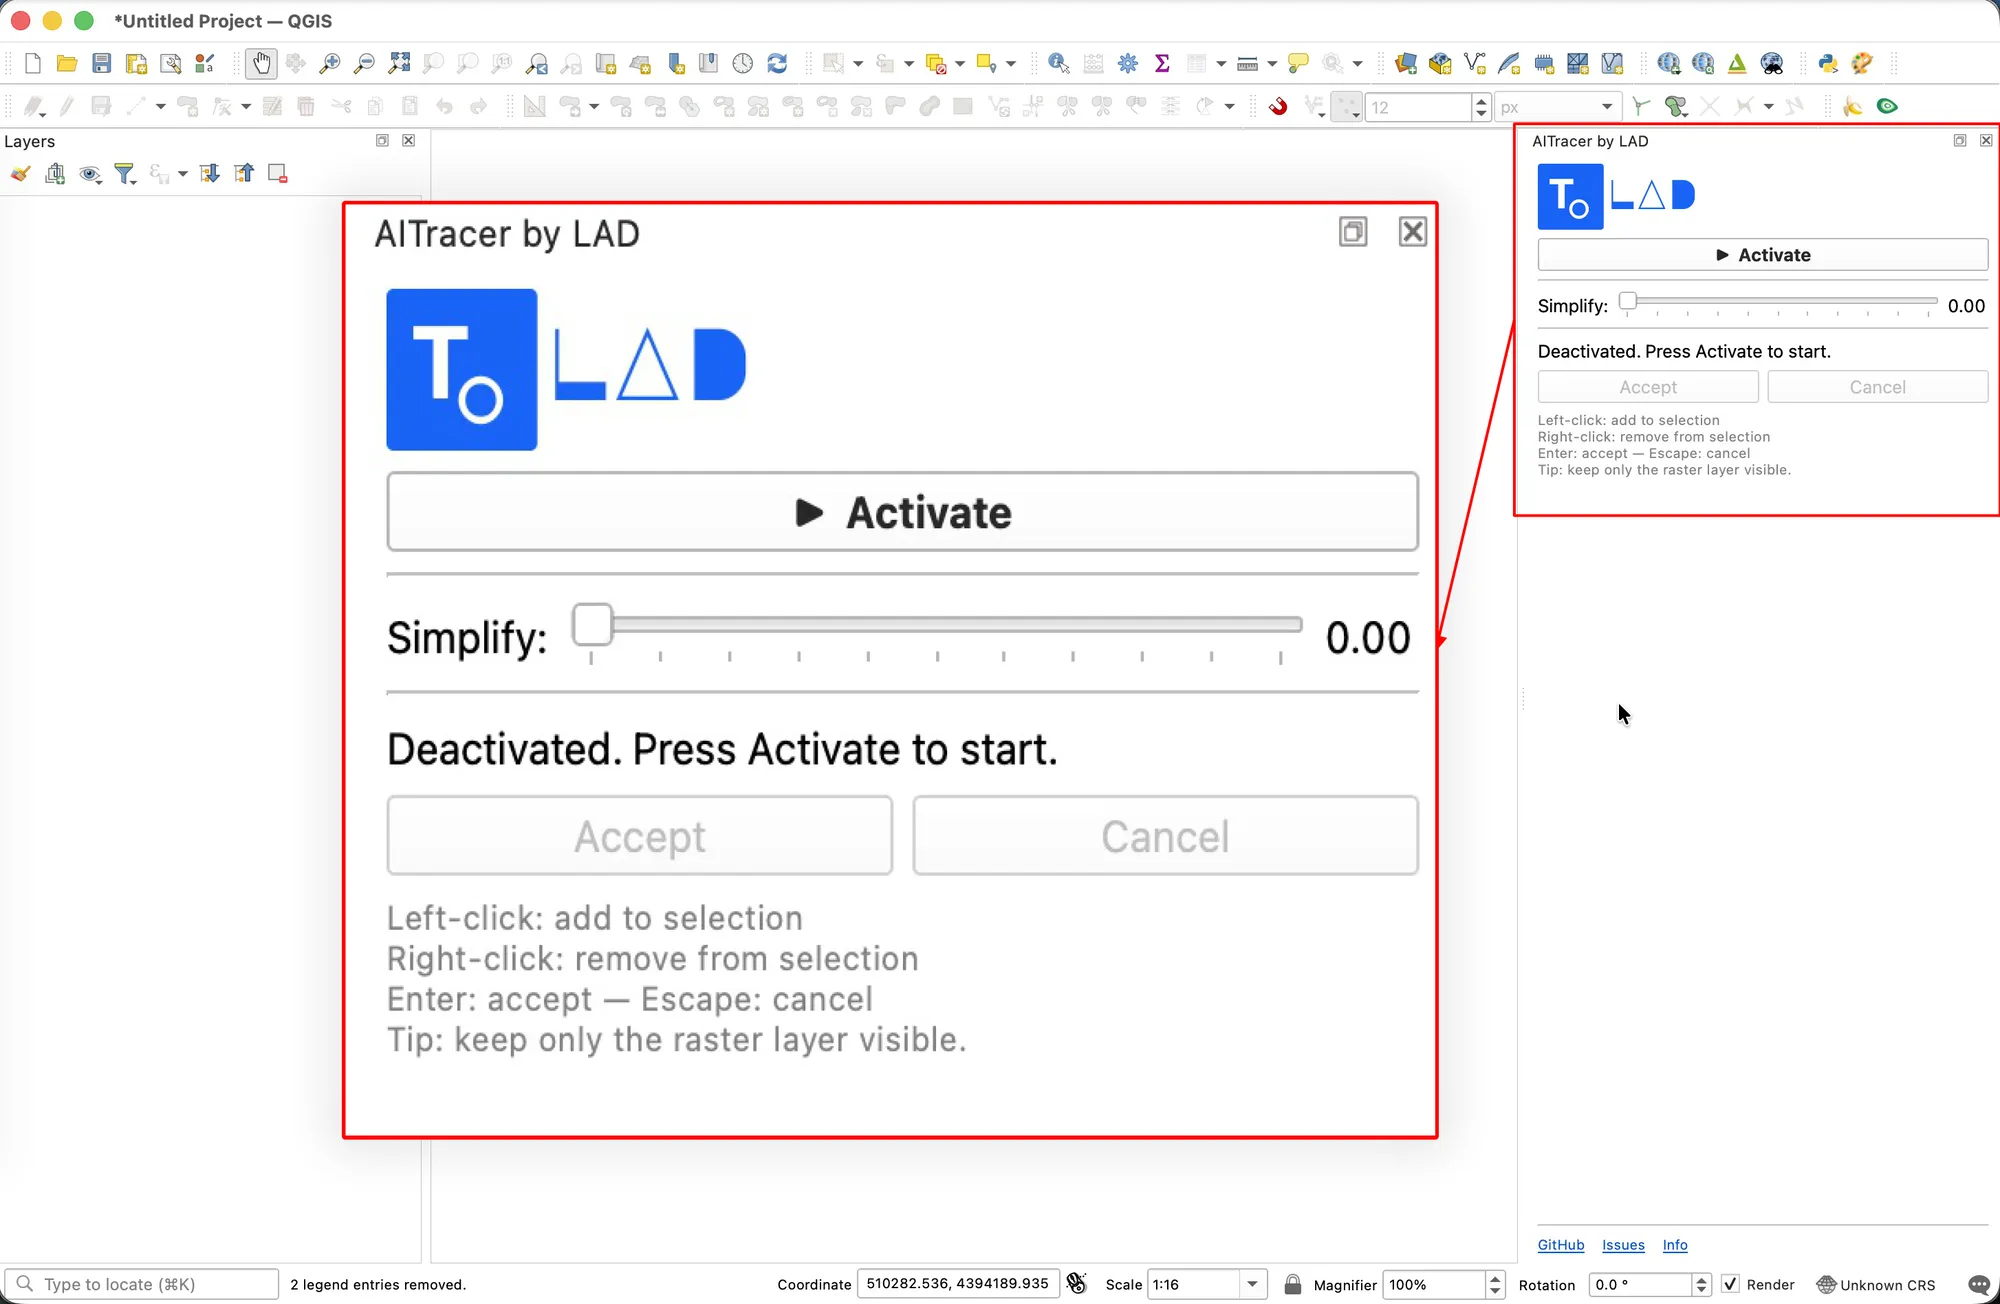 The AITracer by LAD panel with the activation button, the simplification slider, the Accept and Cancel buttons, and links to GitHub and the documentation.
Positive and negative prompts
The heart of the system is iterative interaction with the model through prompts:
- Left click — positive prompt: tells the model a point that must be included in the polygon.
- Right click — negative prompt: indicates a point to exclude, useful for refining the outline when the model includes unwanted areas.
Each additional click refines the segmentation without recomputing the entire image analysis, thanks to an image-encoding cache that the backend keeps for the whole duration of the session.
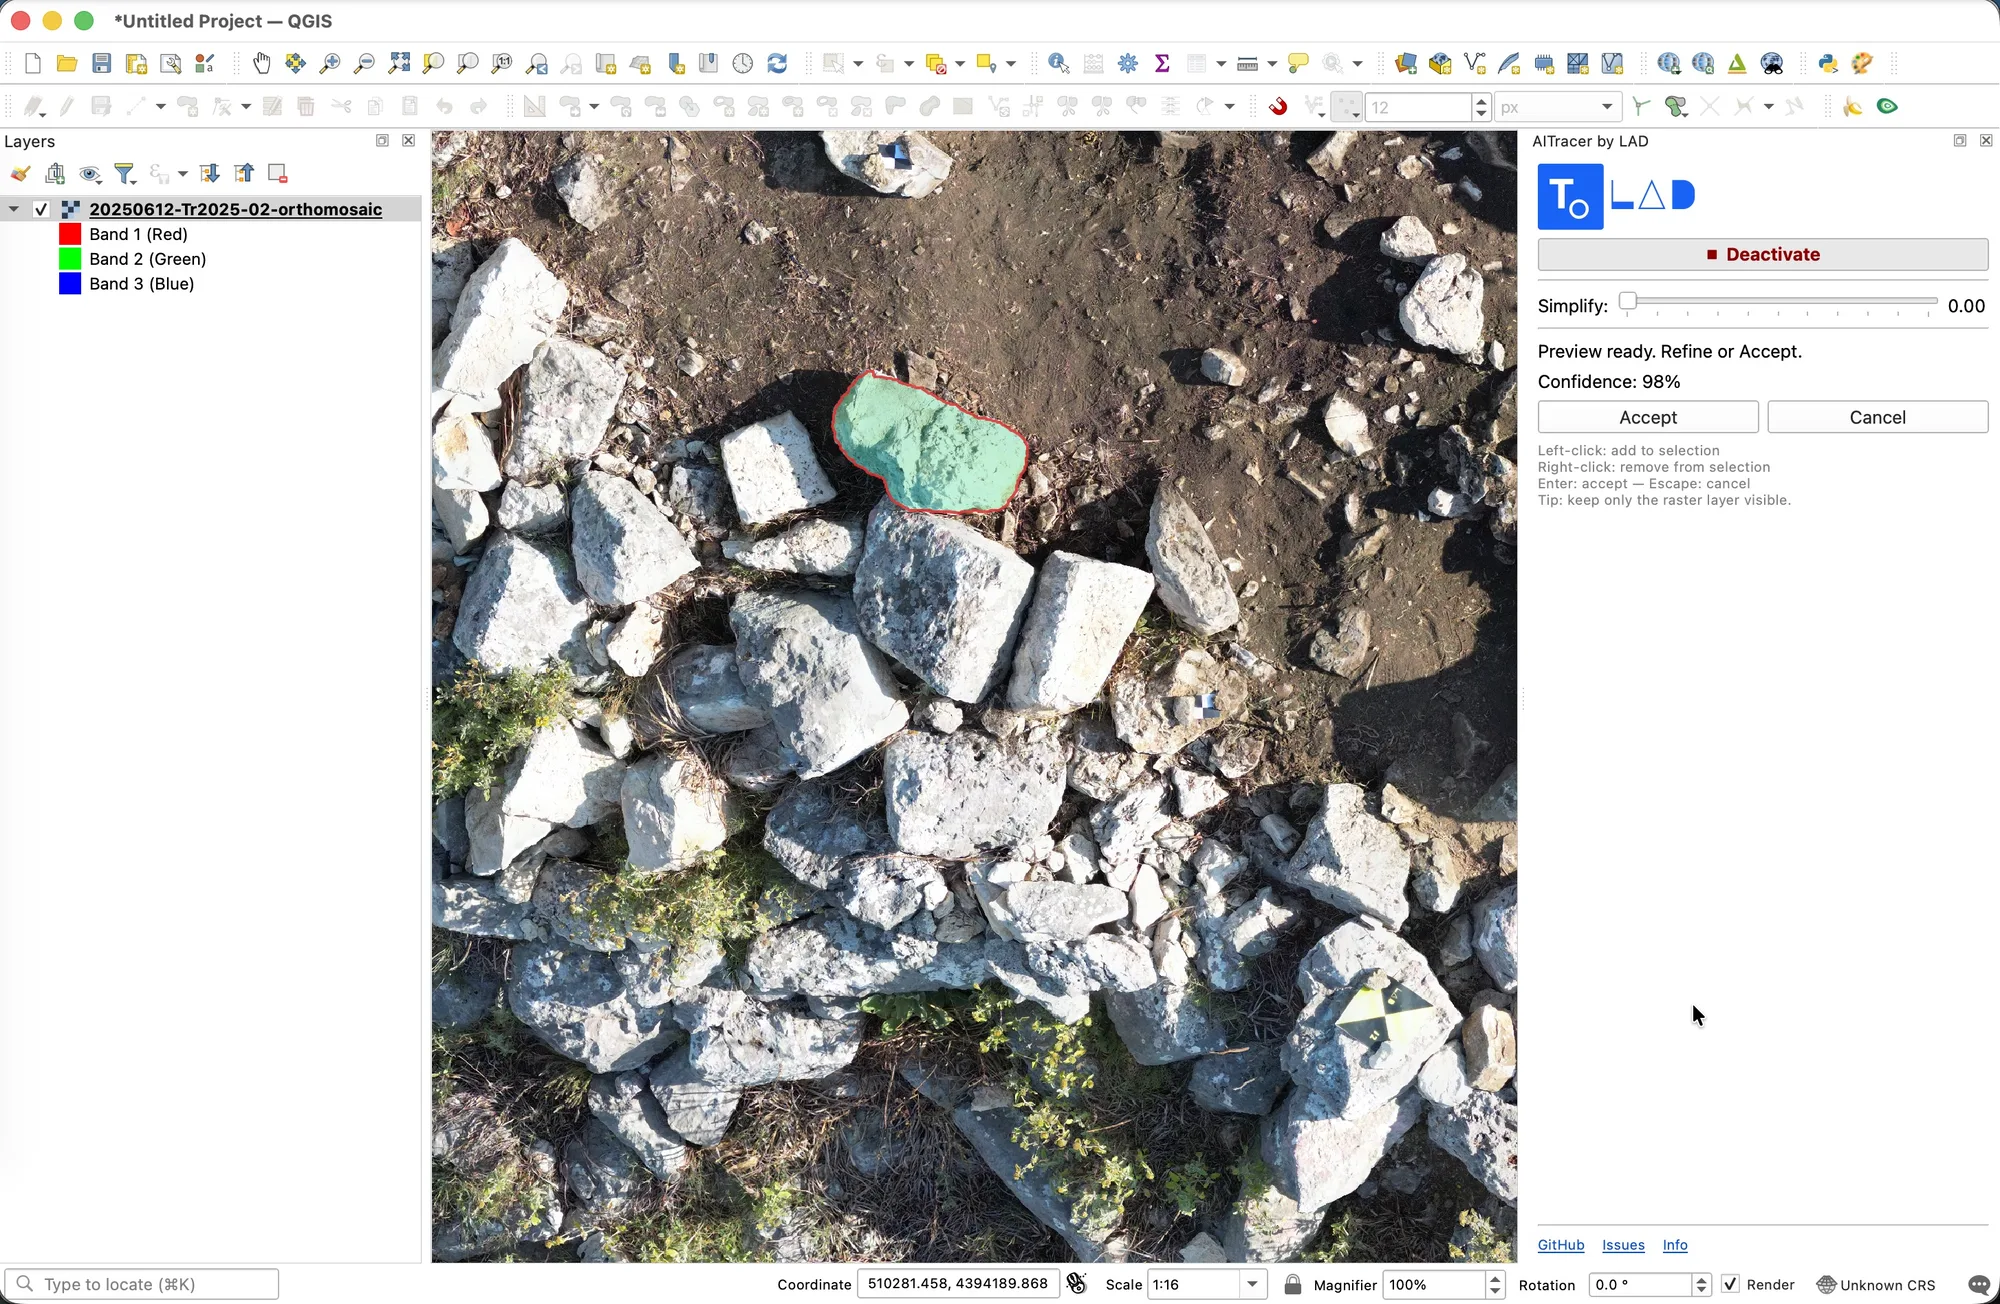 After the first left click on the orthophoto, SAM2 almost immediately returns a preview of the polygon (in green) overlaid on the raster layer.
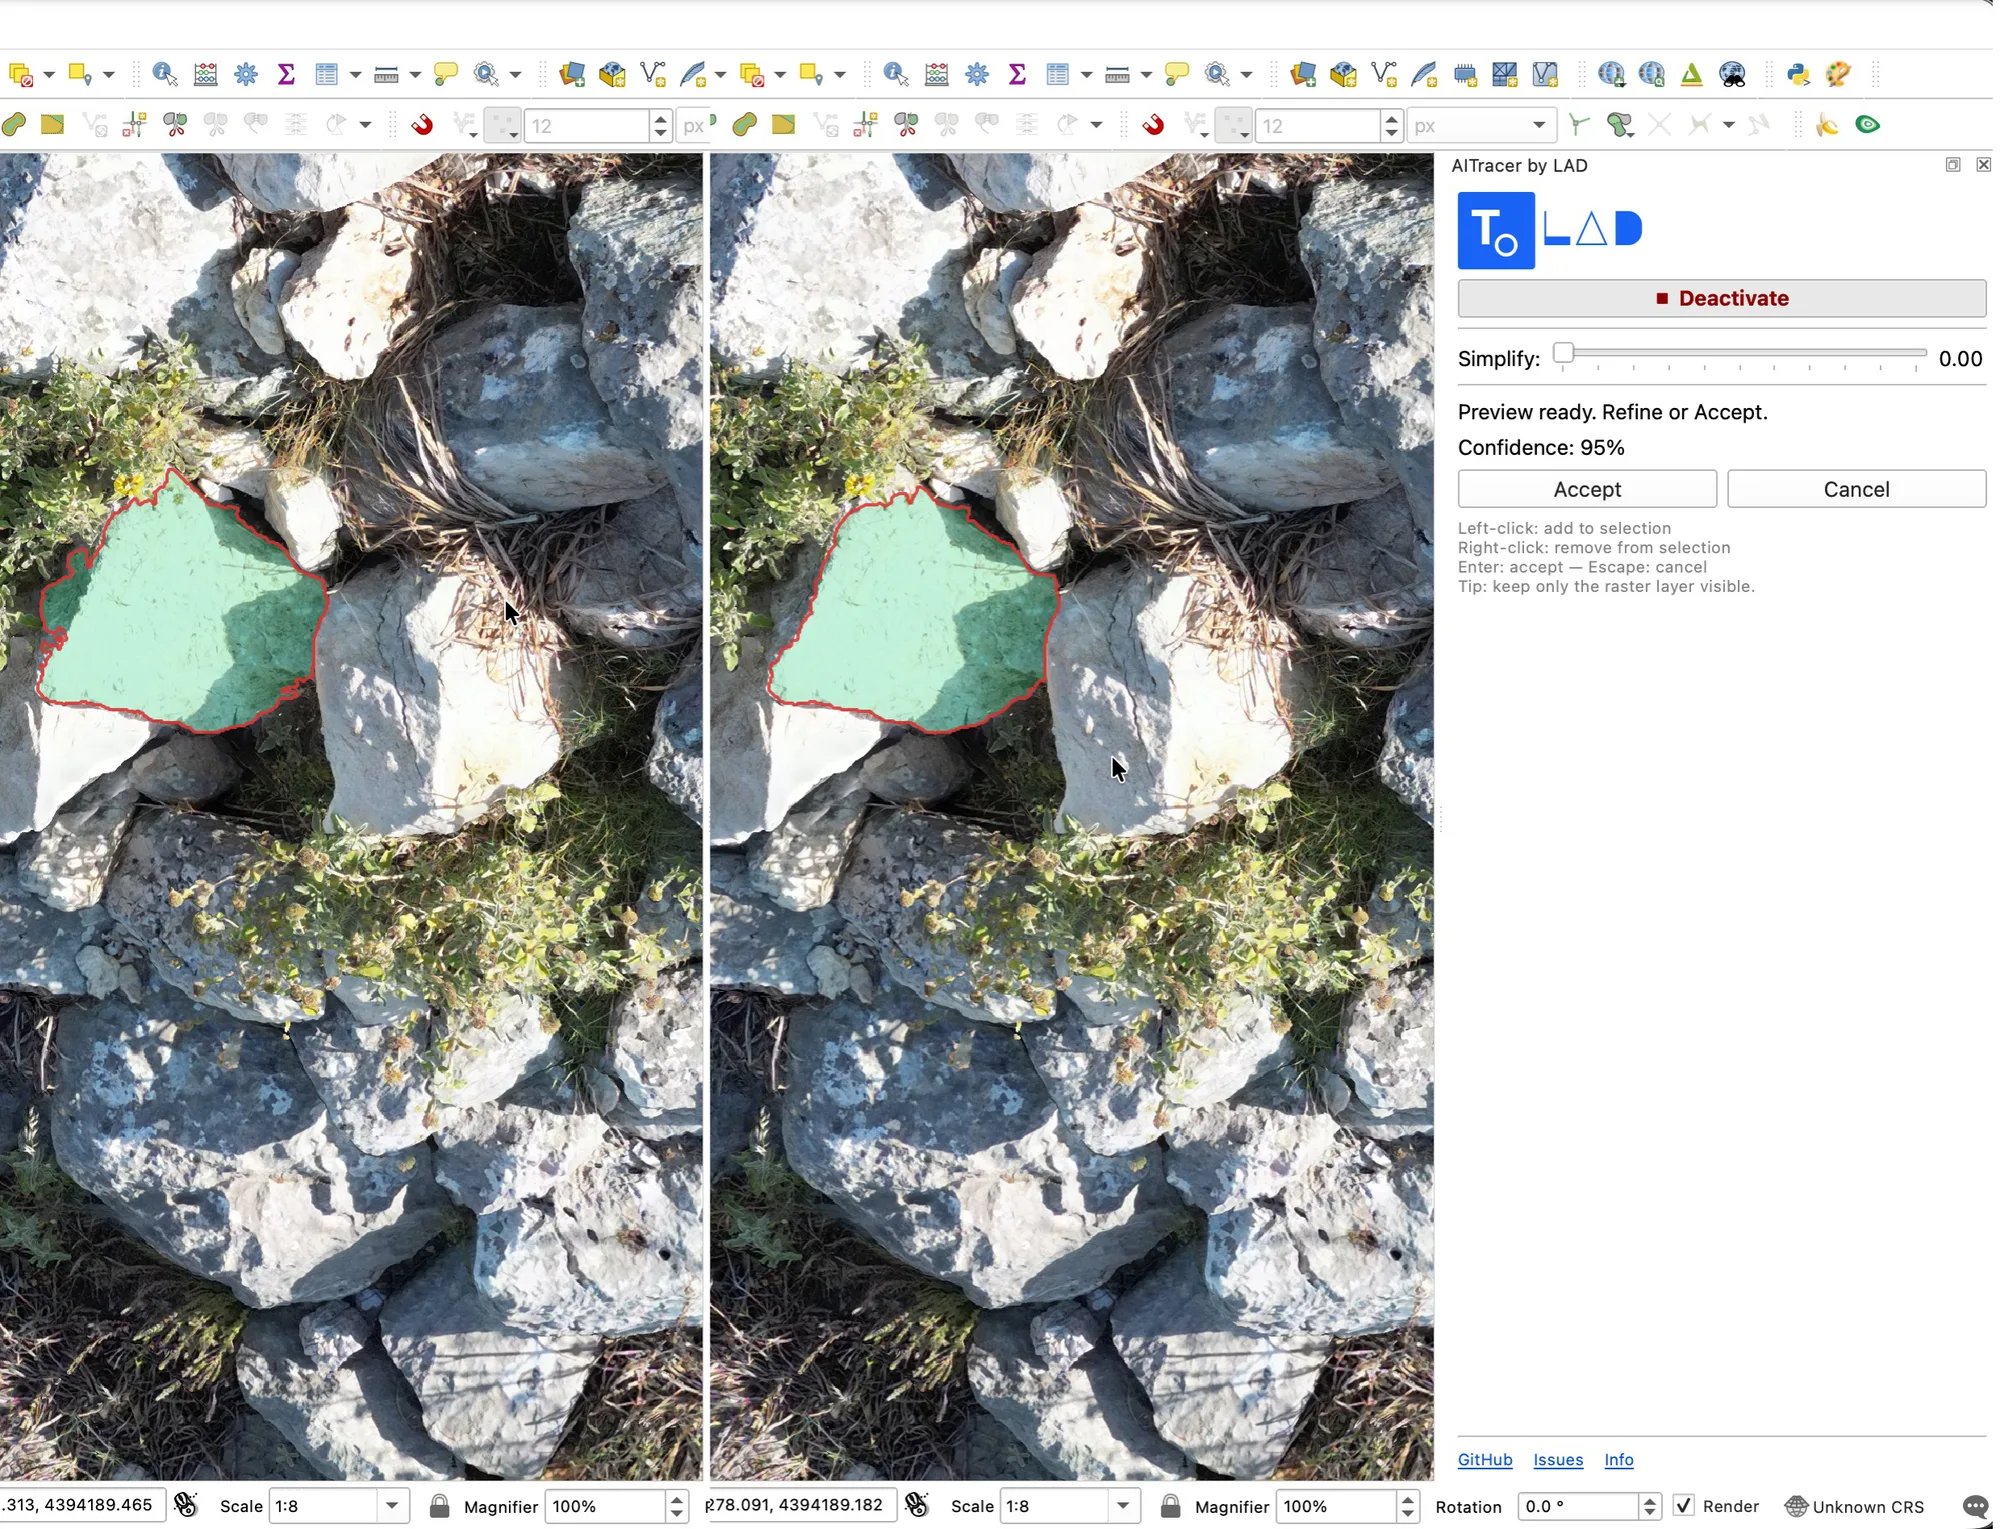 Adding negative prompts (right click) to exclude adjacent areas mistakenly included in the initial segmentation. The preview polygon updates in real time.
Real-time geometric simplification
The masks produced by SAM2 can contain a very high number of vertices. AITracer includes a Douglas-Peucker simplification slider that lets you control the vertex density of the final polygon before accepting it, with steps of 0.01 map units and a range from 0 (no simplification) to 0.50.
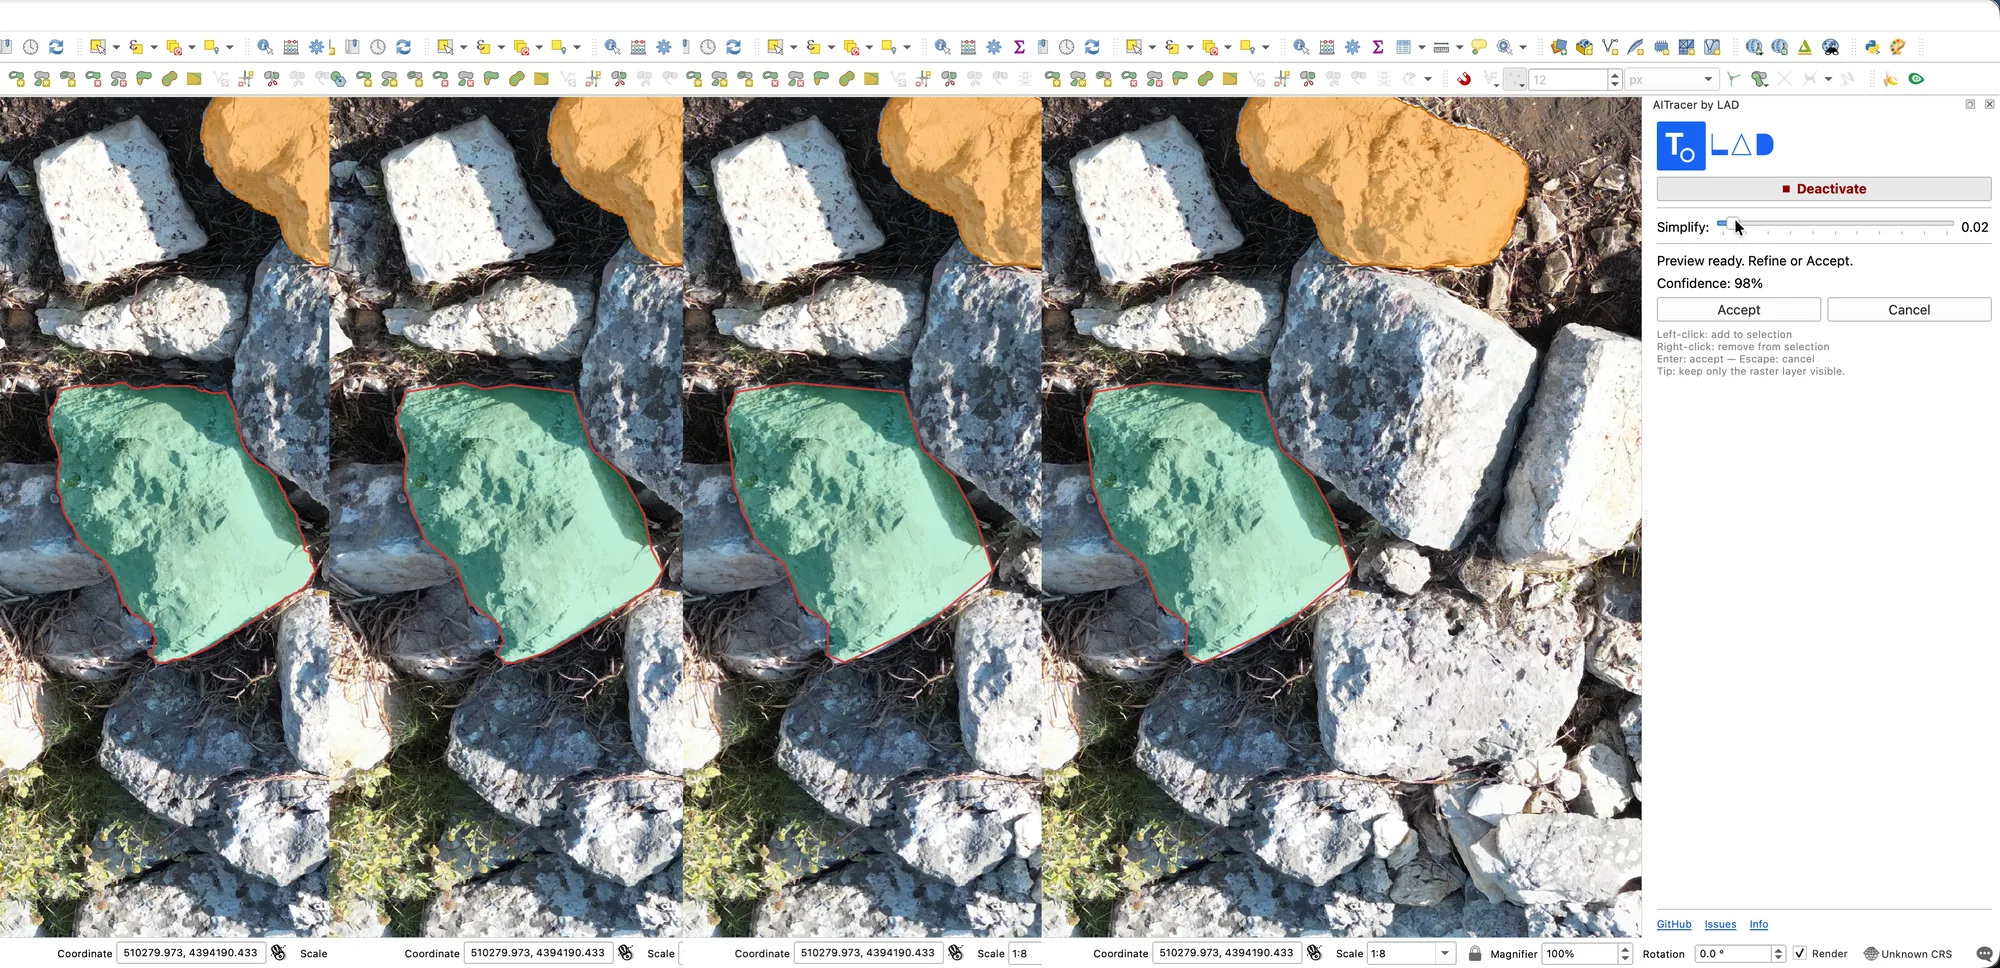 Comparison between the polygon with simplification at 0 (left, many vertices) and with simplification at 0.15 (right, simplified outline but faithful to the original shape).
Undo the last point
If a click was placed in the wrong spot, there is no need to cancel the entire session. Ctrl+Z removes the last point entered — positive or negative — and immediately recalculates the segmentation with the remaining points. You can go back as far as you like, all the way to clearing every prompt.
Accepting and saving
Once satisfied with the outline, press Enter (or the Accept button in the panel). The polygon is automatically added to a temporary in-memory layer called AITracer, created by the plugin with a semi-transparent orange style. The layer is fully integrated with the QGIS project and can be exported to any vector format.
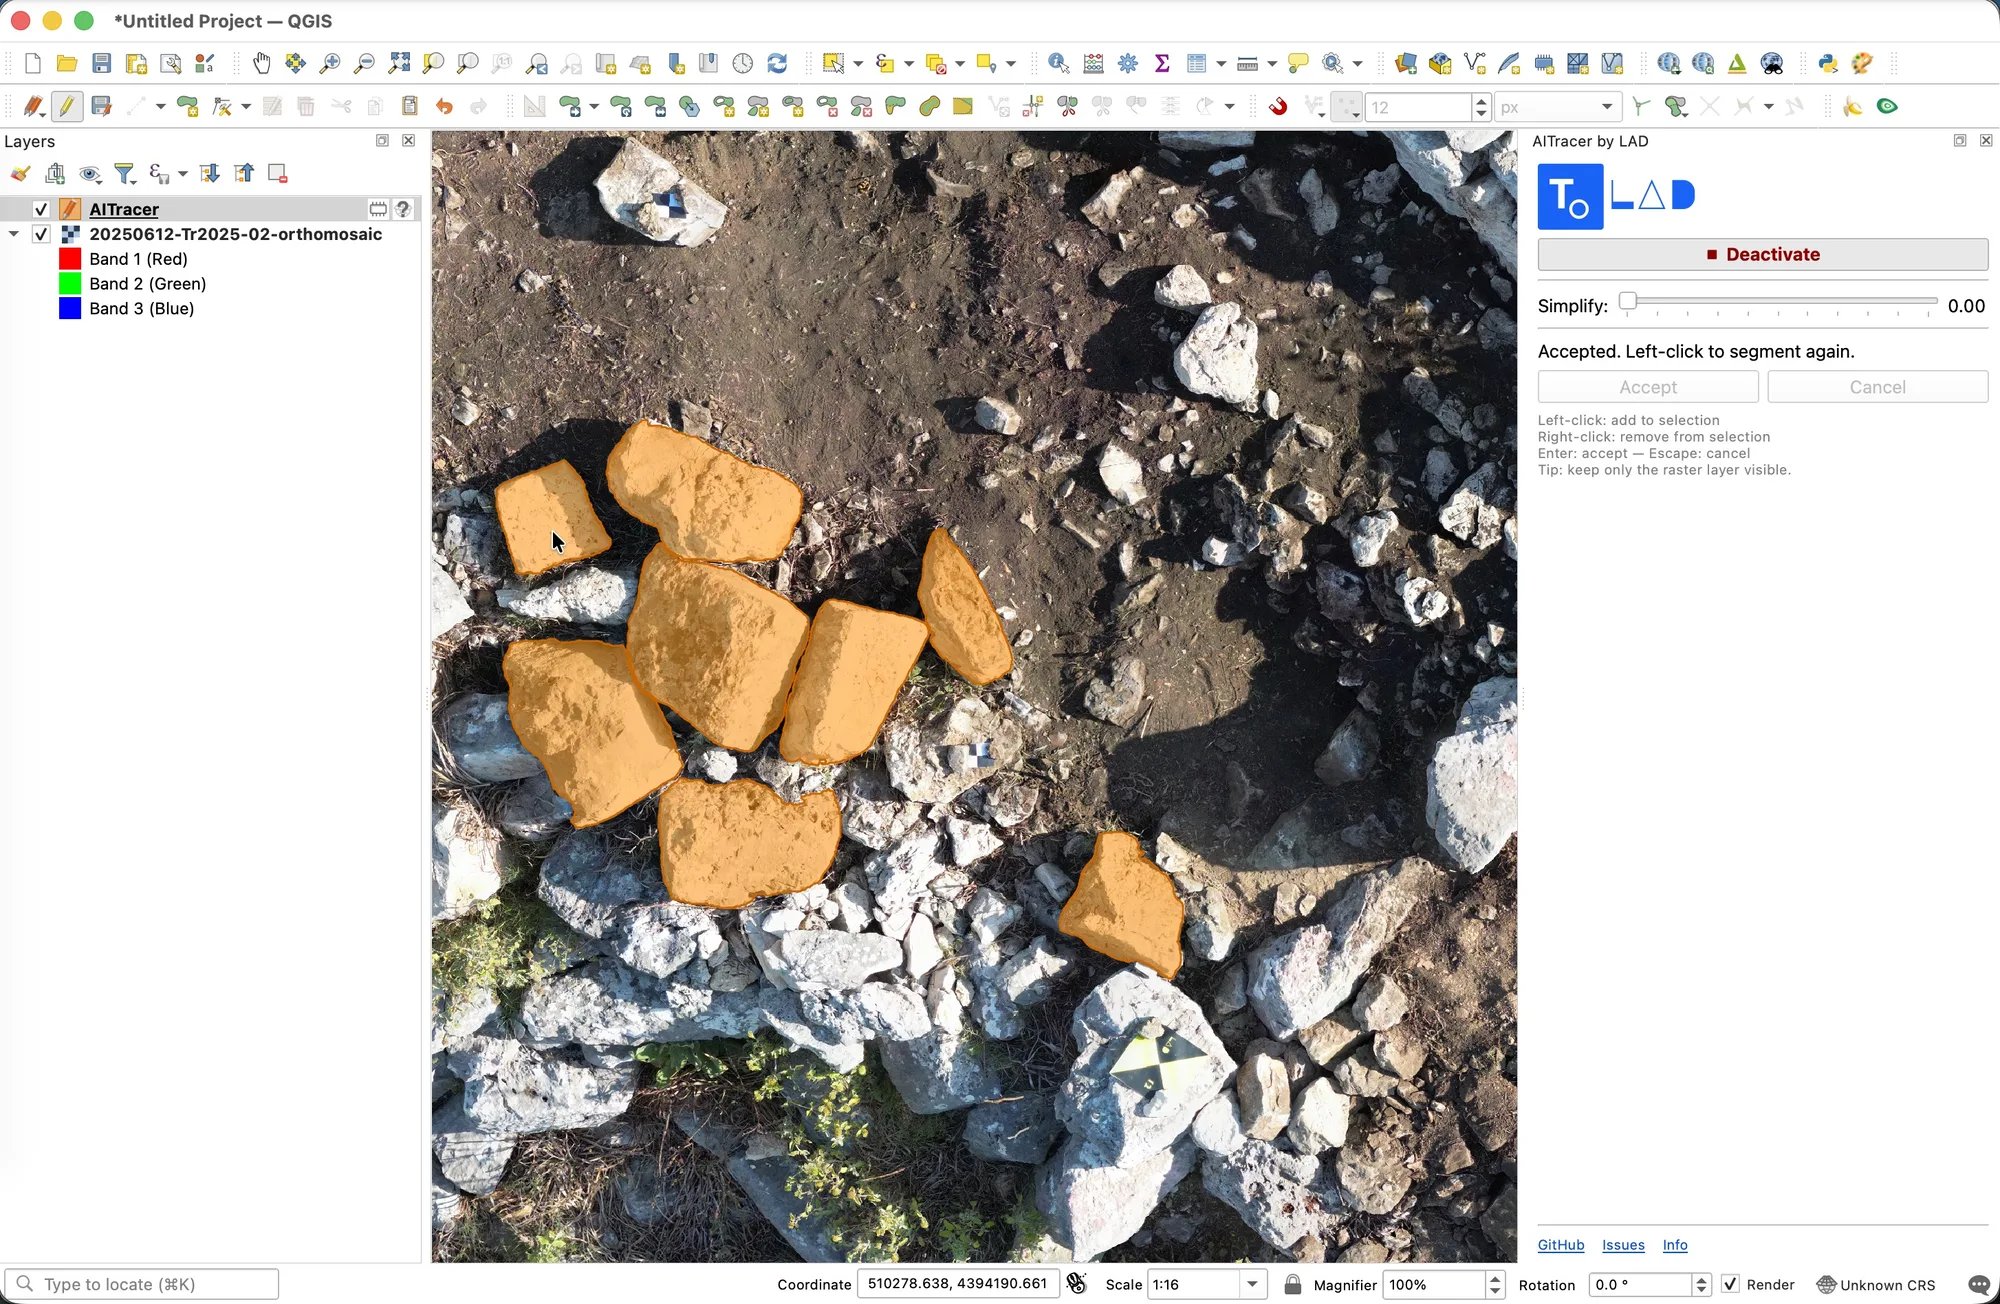 The accepted feature appears in the AITracer layer (in semi-transparent orange) overlaid on the source raster layer. You can continue digitizing new features without interruption.
Choosing the destination layer
By default, accepted polygons are inserted into a temporary in-memory layer called AITracer. However, the panel lets you choose any polygon vector layer already present in the project as the destination, via a drop-down menu that updates automatically. On the first acceptance, the menu is set to the newly created AITracer layer, so subsequent clicks flow into it without having to select anything.
Each accepted feature automatically records three attributes:
| Field | Content |
|---|---|
fid | Automatic sequential identifier |
timestamp | Date and time of acceptance (ISO 8601) |
raster | Name of the source raster layer |
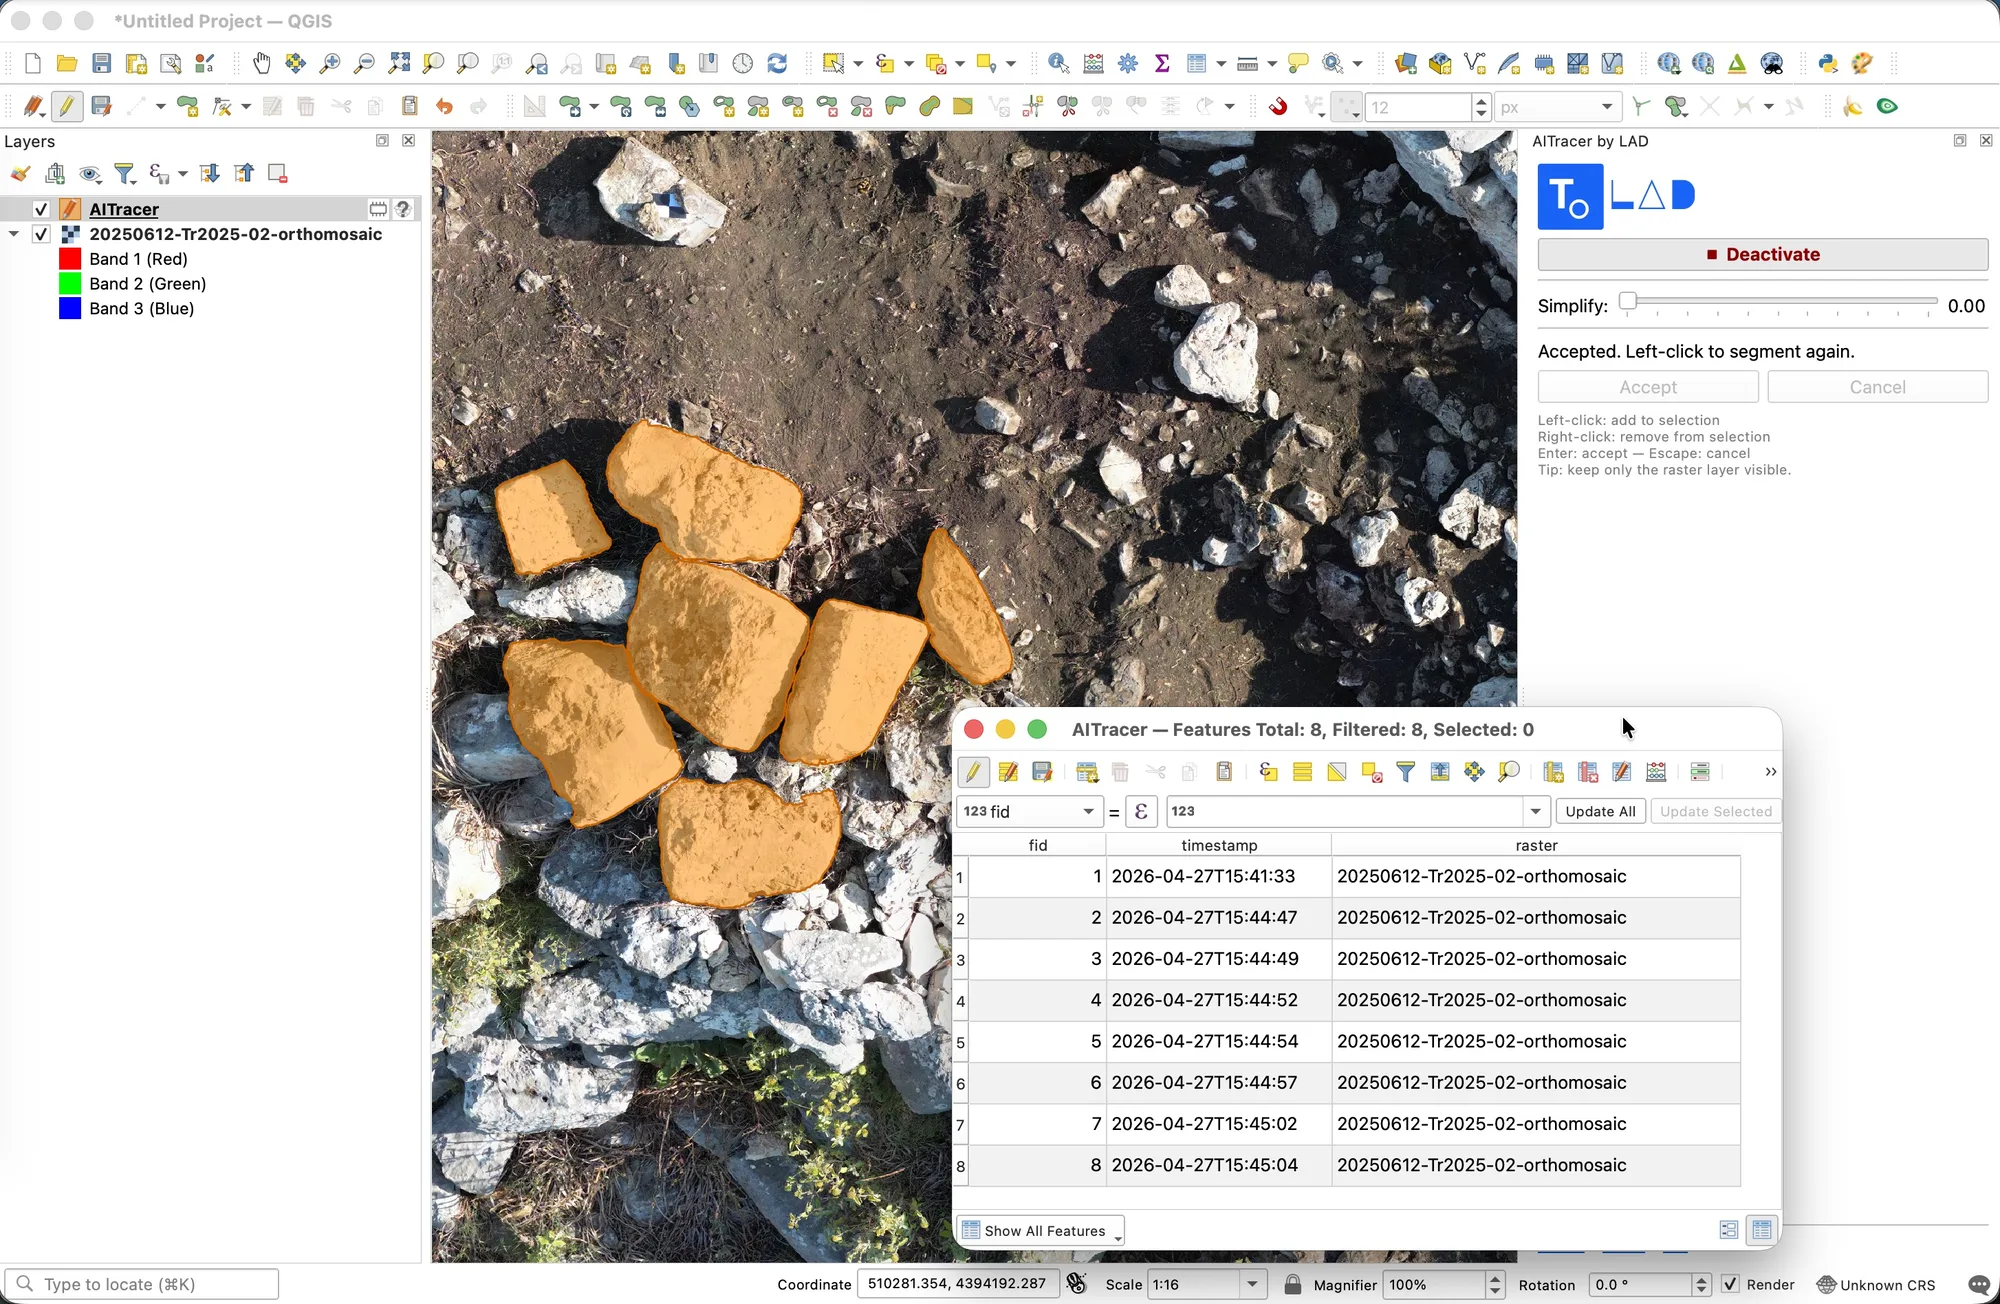 The attribute table of the AITracer layer with the fid, timestamp and raster fields automatically filled in for each accepted feature.
First installation: everything automatic
The plugin manages its own computational infrastructure autonomously. On first launch it:
- creates a Python virtual environment in
~/.aitracer/venv; - installs the necessary dependencies (FastAPI, PyTorch, SAM2, OpenCV);
- downloads the SAM2-tiny model weights (~40 MB).
A progress dialog keeps the user informed at every stage. Subsequent activations take only a few seconds.
Installing the plugin
AITracer is available on the official QGIS plugin repository: plugins.qgis.org/plugins/aitracer. This makes installing and updating the plugin extremely simple, with two methods available.
Method 1 (recommended): directly from QGIS
- In QGIS, open Plugins → Manage and Install Plugins.
- Under Settings, check the Show also experimental plugins option (AITracer is currently classified as experimental).
- On the All tab, search for AITracer and click Install Plugin.
With this method, QGIS will automatically notify you when new versions are available.
Method 2: manual download from the repository
Alternatively, you can download the ZIP package directly from plugins.qgis.org/plugins/aitracer via a web browser and install it in QGIS with Plugins → Manage and Install Plugins → Install from ZIP.
Method 3: from GitHub releases
For those who want to test specific or pre-release versions, the aitracer-vX.Y.Z.zip packages are also always available from the GitHub Releases page.
QGIS 4.0 is required. The necessary Python runtime is automatically downloaded and installed by the plugin on first launch via python-build-standalone: no manual Python installation is required.
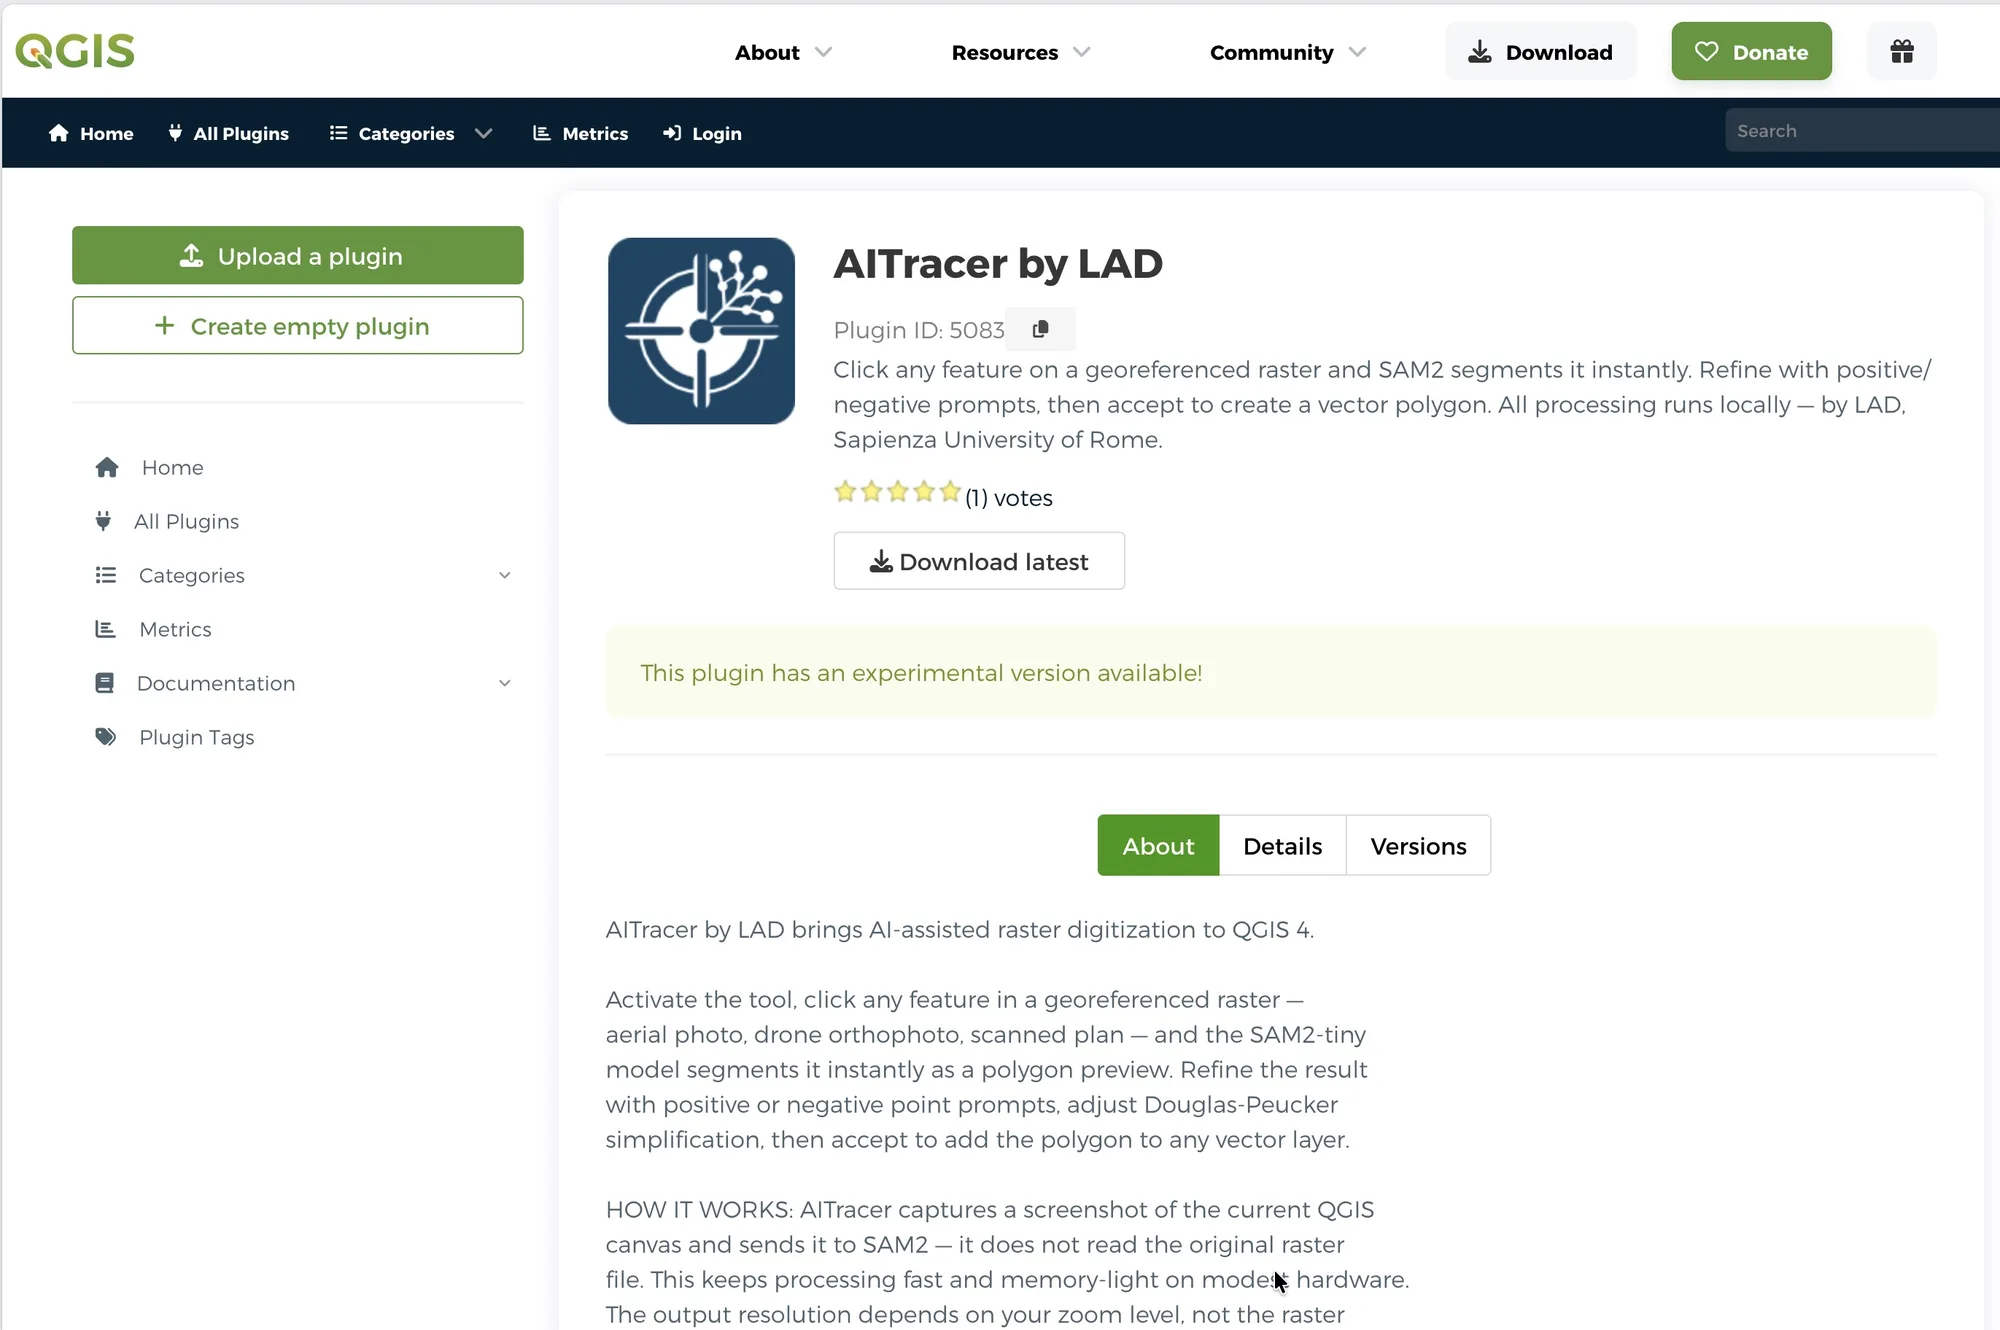 The AITracer page on the official QGIS plugin repository.
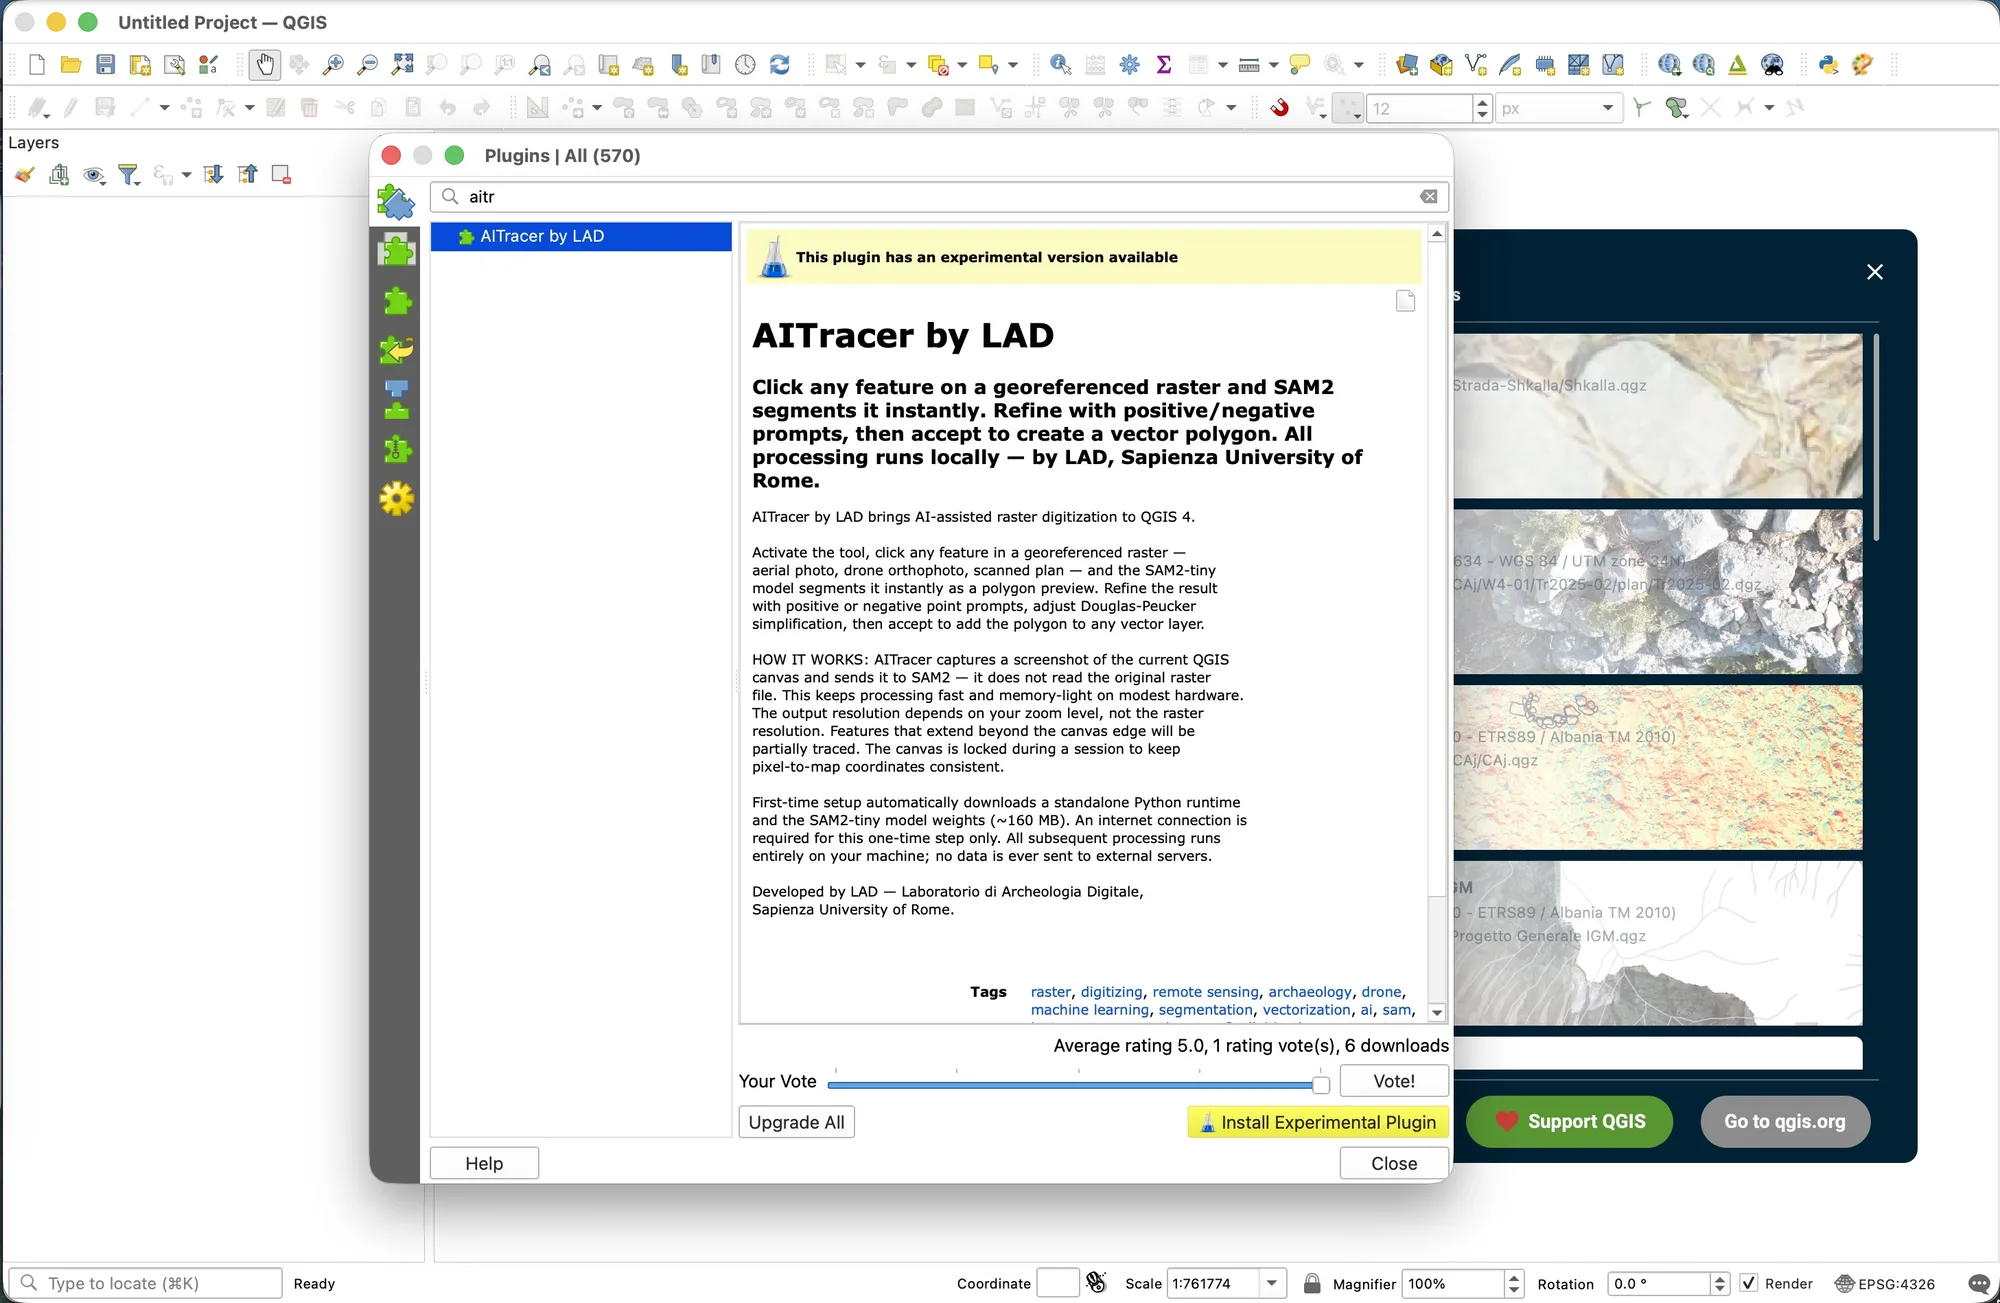 The QGIS plugin manager with AITracer found in the official repository, ready for installation.
Important usage notes: AITracer does not read raster files, it captures the screen
AITracer uses the screen, not the raster file: here is why this matters
AITracer captures a screenshot of the QGIS canvas at the moment you click. It does not read the original raster data. This is a deliberate design choice: it keeps memory consumption low and segmentation fast even on modest hardware. This way, no multi-gigabyte file needs to be decoded or loaded into RAM.
This choice has three practical consequences that are important to know before you start digitizing:
- Resolution depends on the zoom level. If you are zoomed far out, each screen pixel represents a large geographic area and the polygon edges will be approximate. Zooming in until the feature fills most of the canvas gives the most precise result.
- The feature must be fully visible. Any part of an object that extends beyond the edge of the canvas is simply absent from the screenshot. If a wall, a plot boundary or any other shape runs off the screen, only the visible portion will be included in the polygon. Before clicking, pan and zoom the view so that the entire feature is visible.
- The canvas locks during the session: this is intentional. After the first click, the extent of the canvas is frozen until acceptance or cancellation. Panning or zooming the view during the session would invalidate the correspondence between pixel coordinates and geographic coordinates, producing incorrect geometries. The lock is released the moment you press Enter or Esc.
Practical tip: before activating the tool, zoom in on the feature to digitize leaving a small margin around it, and make sure the raster of interest is the only visible layer. Then activate, click, refine and accept.
A note on method: pair programming with AI
This plugin was also born as a methodological experiment. The entire design and development process — from the system architecture to individual Python functions, from backend management to the panel UI — was carried out in close collaboration with Claude by Anthropic, an assistant based on large language models.
The result is code that works and has been field-tested, but above all a concrete reflection on how generative AI can support — not replace — the researcher in producing digital tools for humanities research. Design control, interpretive choices and verification of results always remained with the human researcher.
Try it and contribute
AITracer is under active development. Every field test, every issue report and every suggestion is valuable for improving it.
- 📦 Source code and releases: github.com/lad-sapienza/ai-tracer
- 🐛 Report an issue: github.com/lad-sapienza/ai-tracer/issues
- 📖 Learn more: lad.saras.uniroma1.it/blog/ai-tracer
- ✉️ Contact: julian.bogdani@uniroma1.it